
Follow One Clove Through an Entire Garlic Season
The clove you plant in autumn is both a small package of stored energy and the starting point for next year's bulb. Its pointed end produces the shoot, while the basal end supports roots that begin establishing before the most visible spring growth. That simple arrangement makes garlic approachable, but the crop still depends on timing, suitable planting stock, and steady care across several seasons. A good harvest begins months before you pull a bulb, with a variety suited to your climate and a bed that drains well. It finishes with careful lifting and curing rather than a rushed wash and a sealed bag. The following sequence explains what each stage is meant to accomplish, so you can adapt the details to local extension recommendations. From choosing cloves to setting aside the next season's planting material, the goal is a healthy crop whose progress you can recognize and manage.
A: Use sound suitable planting stock with papery coverings intact rather than cloves peeled for kitchen preparation.
A: The broad basal end goes downward, leaving the pointed shoot end directed upward before soil covers the clove.
A: No, autumn is common but climate and variety guidance should determine the planting window in your region.
A: Use regional recommendations for soil coverage because winter climate and soil conditions can change the appropriate planting depth.
A: No, persistent waterlogging threatens roots and bulbs, so improve the bed's drainage before planting the crop.
A: It is a scape, which can be harvested while tender without removing the useful leaves around it.
A: No, judge readiness using leaf condition and a sample bulb alongside seasonal cues from the scapes.
A: No, inspect samples while upper leaves remain green because waiting for completely brown foliage can be too late.
A: Curing relies on controlled drying, so brush loose soil gently instead of adding unnecessary moisture after harvest.
A: Save healthy bulbs from an identified regionally suitable variety, retaining records and excluding damaged or questionable planting material.
Start With Garlic Suited to Your Region
Buy healthy planting garlic from a reliable supplier that identifies the variety and its intended growing region. Garlic sold for eating may be poorly matched to your climate, and it is not necessarily selected or inspected for propagation. A diseased clove can introduce a problem into a bed that was previously healthy. Choose sound bulbs without soft areas, mold, or suspicious damage. Planting stock is one place where saving a little money can create a much larger gardening disappointment.
Hardneck and softneck garlic differ in growth habit and regional performance. Hardneck types commonly develop a firm flowering stalk, called a scape, and many are well adapted to cold-winter regions. Softneck types generally lack that central hard stalk and are often used in milder climates, though specific varieties matter more than a broad label alone. Hardneck cloves may be arranged in a simple ring around the stem, while softneck bulbs can have multiple layers. Ask a local source which types reliably form good bulbs under your conditions.
Keep variety identities through planting and harvest if you are trying more than one. Differences in maturity, clove size, flavor, and keeping quality become useful only when you can connect them to the right plant. A small comparison in the same garden is more informative than assuming that a variety praised elsewhere will behave identically at home. Record the supplier and planting date along with the name. This information helps distinguish a regional mismatch from a problem with weather or bed preparation.
Prepare a Sunny Bed That Drains Freely
Choose a site with ample sunlight and soil that lets excess water drain away. Garlic needs moisture for growth, but persistent saturation can damage roots and bulbs. A raised bed may help on a suitable site, yet simply piling more soil over a poorly drained location does not guarantee a solution.
Observe water movement after rain and correct practical drainage issues before planting. Soil testing can guide fertility decisions without encouraging unnecessary fertilizer.
Prepare a loose workable bed where roots can establish and bulbs have room to develop, while keeping the planting area accessible for weeding and watering. Account for nearby plants that will shade the crop when spring growth resumes, even if the autumn bed appears fully sunny. Leave a practical route for hoses and harvesting tools so routine care does not require stepping into the soil.
Where previous onion-family crops have experienced disease, seek local rotation advice before choosing the location. The empty space left by a harvested vegetable is convenient, but convenience alone does not establish that it is a healthy place for garlic.
Set the Planting Date Around Local Conditions
In many regions, garlic is planted in autumn so roots can establish before the soil freezes. The exact date depends on climate and local recommendations, not on a single national calendar. Planting too early can encourage more top growth than intended, while planting into frozen soil leaves little opportunity for establishment. In some mild climates, recommended schedules differ, and spring planting can produce different results from a well-timed autumn crop. Consult regional guidance before deciding which seasonal route fits your garden.
Reserve enough time to prepare the bed and obtain planting stock before the recommended window arrives. Garlic may be available from suppliers earlier than it should go into your soil, so storage and scheduling are separate decisions. Keep the stock in appropriate dry ventilated conditions until you are ready to separate the bulbs. Avoid buying an unidentified late-season bag simply because the bed is finally empty. A deliberate planting date makes the rest of the sequence easier to manage.
Separate and Position the Cloves Carefully
Break bulbs into individual cloves shortly before planting, keeping the protective papery skin intact as much as practical. Select large healthy cloves for the main planting, since the starting material influences the crop's potential. Smaller sound cloves can have a separate role, but they should not be expected to produce the same result as stronger planting material. Do not peel cloves as if preparing them for dinner. Exposed or damaged tissue creates an avoidable vulnerability at the beginning of the season.
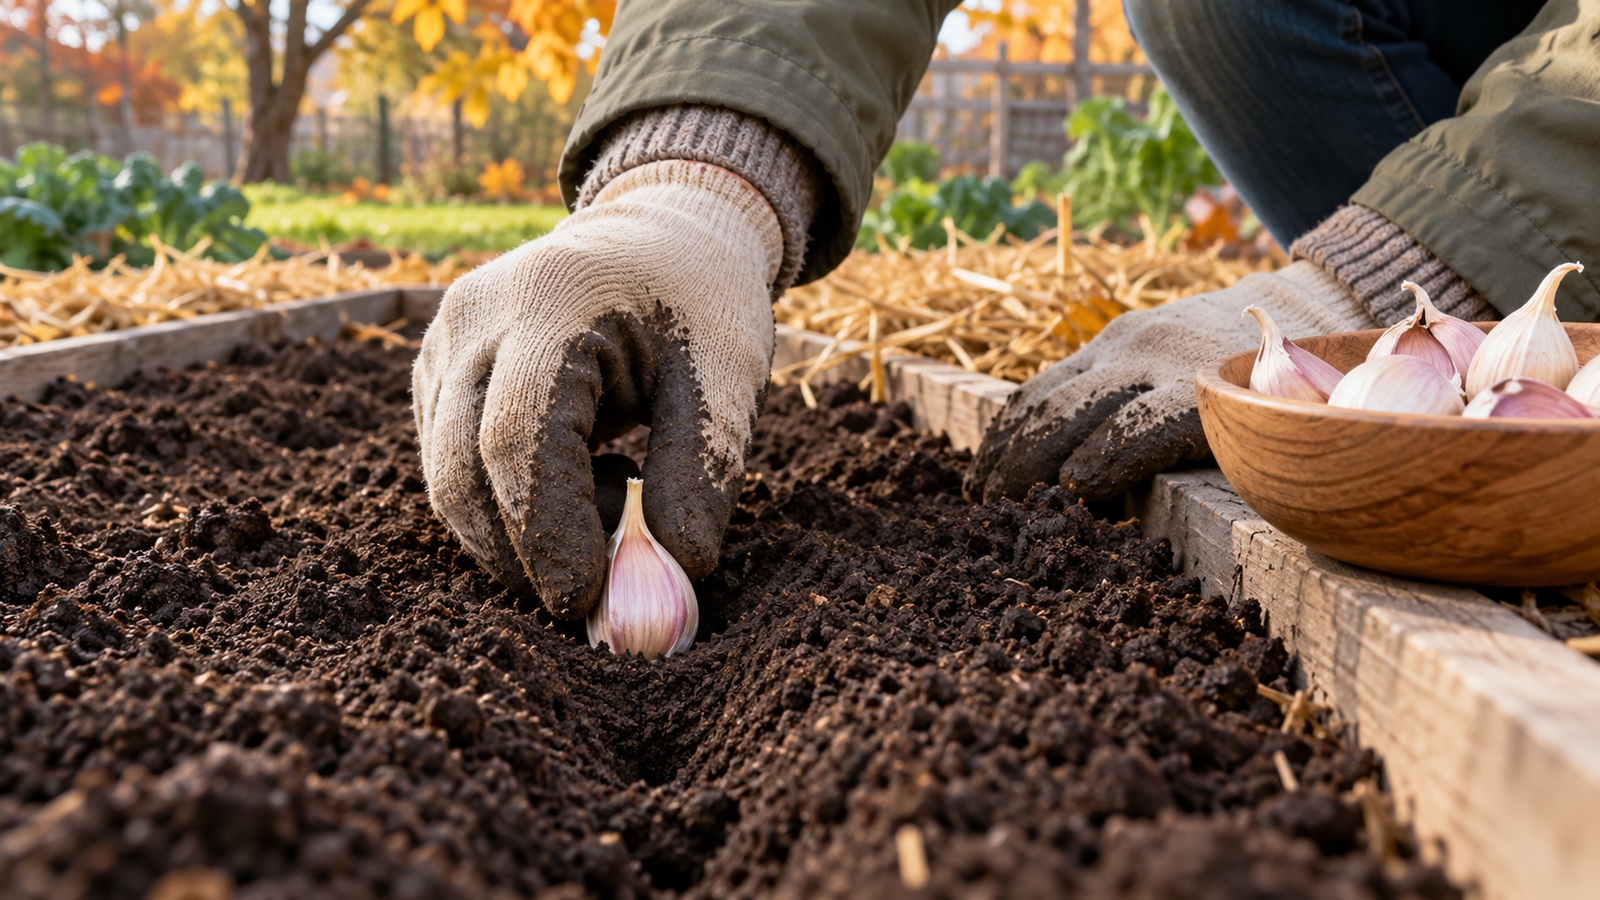
Set each clove with its pointed end upward and its broad basal end downward. Provide spacing that suits local recommendations and your bed arrangement; roughly four to six inches between plants is a common starting point, with room between rows for access. Crowding makes it harder to weed and can limit the development of individual bulbs. Measure a few intervals at the beginning rather than letting the row tighten as planting continues. The bed should remain practical to care for after spring foliage fills the space.
Planting depth varies with climate, soil, and winter protection. Some regional guidance calls for one to two inches of soil above the clove, while colder-region instructions may place the base deeper. Use the instructions for your location rather than blending incompatible measurements. Cover gently, settle the bed as needed, and avoid compacting it into a hard crust. A correctly oriented clove in a suitable depth has a better start than one placed by guesswork beneath an arbitrary mound.
Protect the Bed Through Winter Without Losing Track of It
Apply suitable mulch when local guidance recommends it for winter protection, using a clean material that does not smother the planting. Straw is a familiar option where appropriate, but its depth and timing should fit the climate. Mulch can moderate temperature changes and reduce exposed soil, while excessive wet compacted material may create other problems.
Mark the bed clearly enough that it is not dug over during winter cleanup. Check drainage after heavy weather and keep the site free of accidental foot traffic.
Winter care is often quiet, yet the crop remains in place and benefits from a protected, recognizable growing area. If green shoots appear before winter, evaluate them against the variety and local growing pattern rather than assuming the crop has failed. Avoid repeatedly disturbing cloves to check whether they have rooted.
Surface observations, weather records, and the condition of the mulch usually provide more useful information than digging up a plant. Reserve that closer examination for a specific concern that warrants sacrificing a sample, and protect the remaining planting from unnecessary disturbance.
Support Spring Leaves While Bulbs Begin Developing
As growth resumes, follow local advice about adjusting winter mulch so shoots can emerge and the bed can warm appropriately. Keep weeds from establishing around the garlic, because competition is especially inconvenient in closely planted rows. Pull or cultivate carefully without damaging shallow roots. A few regular visits are easier than extracting large weeds from among mature leaves. The crop's clean narrow foliage can make the bed look orderly even when small competitors are already taking hold beneath it.
Supply water according to soil conditions, rainfall, and the crop's stage. Consistent moisture is especially useful during active growth and bulb development, but constant saturation is not the goal. Check beneath the surface rather than assuming that a dry-looking top layer describes the whole root zone. Fertility should follow soil information and regional recommendations, with attention to appropriate timing. Feeding late or heavily cannot compensate for lost light, chronic waterlogging, or a planting that began with unhealthy cloves.
Decide How to Handle Hardneck Scapes
Hardneck garlic commonly sends up a curling flower stalk as the season progresses. Gardeners often remove the scape to direct more of the plant's resources toward the bulb, and the tender harvested stalk can be used as a culinary ingredient. Cut deliberately without damaging the leaves or pulling the plant loose. Softneck crops generally do not provide the same predictable scape harvest. Learn your variety's normal development before treating the absence of a stalk as a problem.
Scapes provide a seasonal cue, but they do not establish the exact harvest date on their own. Weather, variety, and planting conditions still influence maturity. Continue observing leaves and sample bulbs as the expected harvest period approaches. Removing every stalk does not replace the need to manage water or recognize declining foliage. The task is useful within the crop's wider routine, rather than being a single trick that guarantees large bulbs.
If you leave a few scapes for observation, keep those plants identifiable so you can compare them fairly later. The stalk's shape and development can be interesting, but a casual comparison with plants in different soil or light proves little. Use your observations to understand the variety rather than to promise a universal result. Small garden experiments are most helpful when their limits remain clear. You can then decide whether the extra scape harvest and the removal routine suit your own kitchen and growing habits.
Harvest With Both Leaves and a Sample Bulb
Near maturity, some lower leaves turn brown while upper leaves remain green. This pattern can help indicate harvest readiness, but the proportion and timing vary among types. Lift a sample bulb carefully and examine whether it has developed a suitable size and protective wrappers. Waiting until every leaf has died may leave bulbs overmature and less well protected. Adjust irrigation before harvest as recommended locally, and choose workable soil conditions that allow careful lifting. The most useful decision combines the plant's appearance with an actual look underground.
Cure the Bulbs Before Long-Term Storage
Loosen soil with a tool placed far enough from the bulb to avoid cutting it, then lift gently rather than yanking on the top. Handle the bulbs without banging them together. Brush away loose soil when practical, but do not wash the crop before curing. Freshly harvested garlic needs an airy shaded place where the outer tissues can dry appropriately. Direct hot sunlight and enclosed humid storage are poor substitutes for that controlled drying period.
Curing commonly takes several weeks, with the exact duration affected by conditions and the crop. Arrange or hang bulbs so air can circulate, and inspect for damage or deterioration as the foliage and wrappers dry. Once suitably cured, trim and clean according to the garlic type and intended storage method. Keep sound bulbs in appropriate cool, dry, ventilated conditions, and check them over time. Save only healthy material for planting, preserving the variety name so the next autumn begins with a crop you understand.
Use Regional Garlic Instructions
Compare your schedule and planting depth with University of Maryland Extension’s home-garden garlic guidance and recommendations for your own climate. Choose tools that make gentle lifting and regular bed care easier through Garden Product Reviews.


